So my wife Crystal originally keyed me onto the idea of making a sensory/activity like board for the kids. It seemed like a fun project. I found some inspiration from a couple other blogs but wanted to take it a step further. I decided that the doorbell I was to install and the light switches needed to actually work, otherwise my 9 month old and 1.5 year old would think it was lame. Yeah, I had big expectations to fill to say the least. Here are links to our inspirations: Here and here, I decided that I wanted to make a hybrid of the two!
 |
| After sawing out some crude switch holes, it was off to paint |
 |
| Kids checking out first wired circuit |
The electrical sequence should be as follows (although the switch could technically go anywhere):
12V Battery Source (+ end) >> (+) LED wire >>LED>> (-) LED Wire >> Switch >> 12V Battery (- end)
 |
| Trying a simple circuit using a single 9V Battery |
Everything else on the board is either held down via screws with nuts on the backside or secured into the 2x4 frame. Cutting an 8 foot 2"x4" will give you all of the frame pieces plus one extra. I used the leftover piece to put in the center of the middle of the plywood sandwich as this will keep the kids from breaking the plywood when they step in the middle. It worked great.
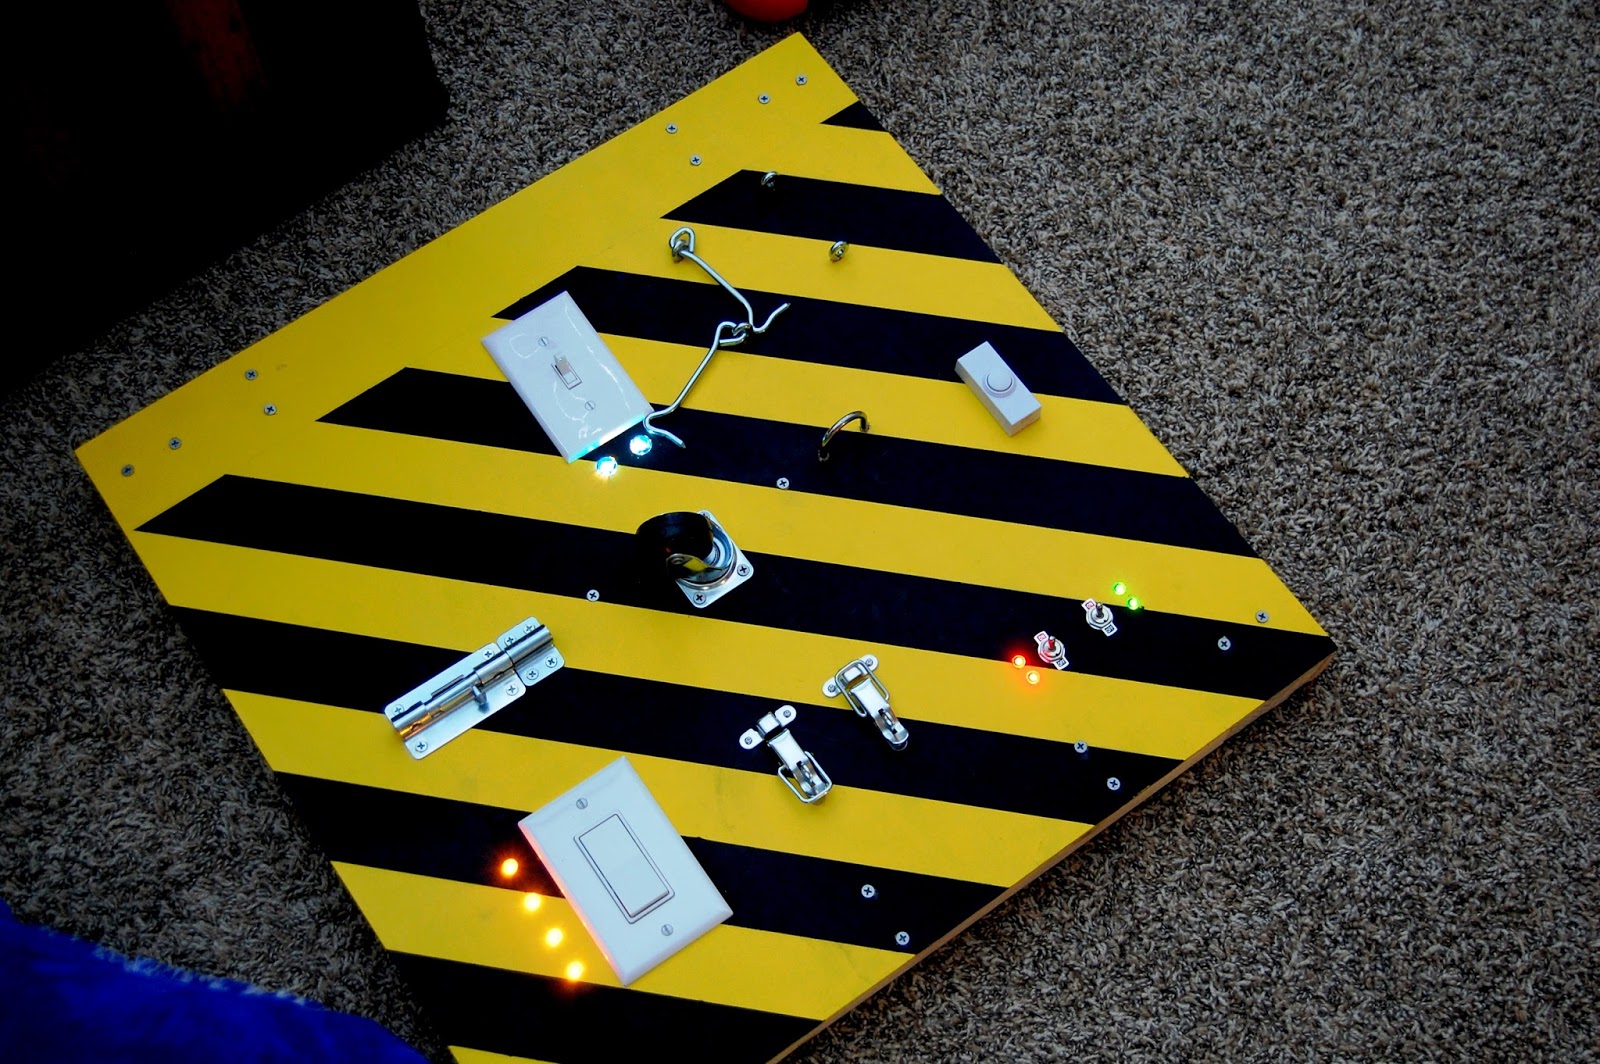
The project cost was probably around $50. It is fun and the kids absolutely love it. Their favorite parts are the doorbell (which I taped up to make more quiet) and the LED light switches. It's got room to grow and we are going to put some finishing touches on it. More to come!
Feel free to comment with any questions/comments!